How to Find and Photograph Aurora Borealis (Northern Lights)
by Chris VenHaus
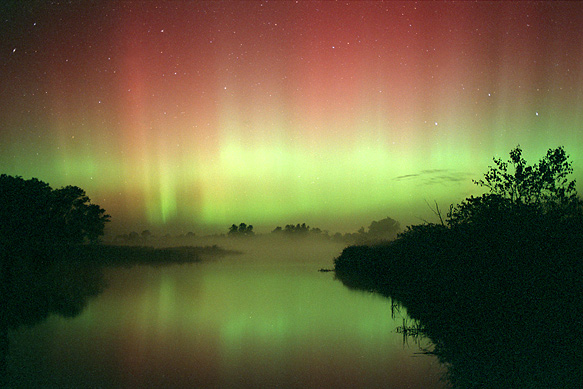
Aurora and Marsh Fog
What causes Aurora?
Coronal Mass Ejections (CME’s)
: CME’s are usually associated with solar flares and prominence eruptions.
The corona is a gaseous region above the Sun’s surface that extends millions
of miles into space. Amazingly, temperatures in the corona may be up to 200
times hotter than the actual surface of the Sun. Large bubbles of hot plasma
within the corona are usually threaded with magnetic field lines that rise
up out of one sunspot and arch back to reconnect at another nearby spot.
A good analogy would be to envision a net holding down a helium balloon.
Sometimes, these magnetic field lines merge and cancel each other out, causing
a hole in this “magnetic net”. The result may be as much as 10 billion tons
(equivalent to the weight of 27,000 Empire State Buildings) of hot plasma
ejected for several hours at speeds approaching 1 to 5 million miles per
hour. Due to the sheer speed and mass, the energy released can approach that
of nearly 10 million volcanic explosions or 100 hurricanes! When an Earth
directed CME cloud collides with our magnetosphere, the electrons, protons,
and oxygen ions of Earth’s Van Allen radiation belts become denser, hotter,
and faster. The motion of these particles can produce nearly one million
amperes of electrical current and disrupt the strength of Earth’s magnetic
field enough to allow some of the excited particles to crash into our upper
atmosphere, about 40 to 200 miles above the Earth. Oxygen and nitrogen atoms
react to the bombardment by becoming electrically excited and emit light.
Voila! The world’s largest fluorescent lamp… Aurora!
Coronal Holes: A large region
in the corona that is cooler and less dense than its surroundings, as a result
of open or large, weak magnetic fields. A coronal hole’s inability to magnetically
confine hot gases allows high-speed solar wind particles to be released.
When a high-speed coronal stream is directed towards earth, it may result
in moderate Aurora.
Equipment Needed:
Photographing Aurora doesn’t require a fancy camera body with “automatic
everything”. Some people actually prefer using older manual cameras, which
have a minimum of battery depleting electronics. When working in cold weather,
camera batteries will drain much quicker than normal so keep 2 extra batteries
in your camera bag, or suffer the wrath of Murphy’s Law. The same applies
to bringing 2 flashlights with fresh batteries.
Camera Body: A 35mm body with
manual selection of aperture (f-stop) and exposure up to 30 seconds will
be fine. A camera with a “B” or bulb setting is also OK. The body must
also have manual focus capabilities, or the ability to set the focus to “infinity”.
A cable release or an automatic timer is also recommended, and mirror lock-up
is useful.
Lenses: Lenses that allow the
most light into a camera are known as “fast” lenses, and have maximum apertures
(openings) of f2.8 or wider (“wider” means lower “f” number). Any lens with
an aperture smaller (higher f-number) than f2.8 will result in unacceptably
slow shutter speeds for most Aurora- unfortunately, this excludes most widely
used zoom lenses. For this reason, prime lenses (fixed focal length) are
good choices, and may be found at a reasonable cost.
50mm f1.8 or f1.4 lens Great lens for isolating parts of the Aurora, and stars will appear more prominent within the image.
35mm f2.0 or 1.4 lens Good, fast lens to catch most of the display.
24mm f2.8, f2.0, or f1.4 lens
This would be THE lens I’d buy first for photographing Aurora. It has a
nice wide angle of view, and allows for longer exposure times before
star trails appear.
20mm f2.8, 2.0, or f1.4 lens May be useful for larger Auroral displays that require an even larger field of view than the 24mm lens.
14mm f2.8 lens A specialty lens
that may produce very dramatic effects during large Aurora displays. 14mm
lenses may create circular distortions, and will tilt vertical objects when
the camera is angled towards the sky.
* I have found the best place to buy equipment HERE
Tripod: We are taking exposures
of many seconds, so it is imperative that the camera is mounted on a sturdy
tripod, or your shots will look like globs of color similar to your kid’s
finger paintings. I also recommend using a nylon bungee cord attached in
a “U” shape near the center column of the tripod. Simply step down into the
“U”, and your tripod is anchored nicely from light winds and other vibrations.
Film to use: Film rated 400
to 800 ISO is ideal. Print film has a bit more exposure latitude while slide
film has richer blacks and more realistic colors, in my experience. Fuji
& Kodak films are ideal, with each having its own distinctive color palette.
I prefer Fuji’s professional line of 800 ISO print films and Fuji Provia
400F. Since you will be shooting ALOT of film, it is best to purchase film
cost-effectively. This means ordering via the internet, as you will find
the cost to be about ½ the price you will pay at your local camera
store. I use THIS SOURCE for my film and new equipment purchases.
Filters: Avoid using any filters, even haze or sky filters. They will degrade the quality of the image.
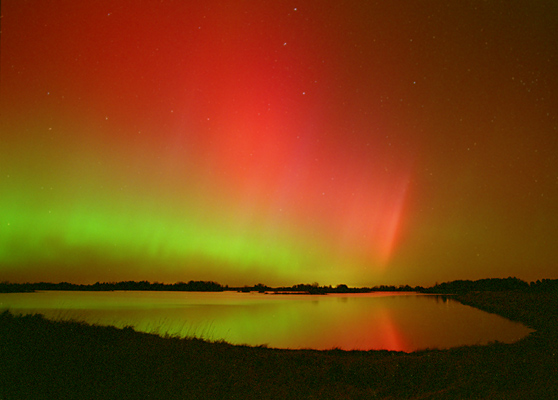
"Brilliant Aurora"
Determining when Aurora might be visible:
Waiting for an event powerful enough to cause a significant geomagnetic disturbance
is the most difficult part of hunting Aurora, especially in middle and lower
latitudes. Be prepared for long hours waiting in the dark and make sure to
bring plenty of coffee! Don’t get discouraged if you drive out to your spot
and don’t see anything- this is quite common. I have found the most photogenic
Aurora to occur between 2 hours before and 2 hours after local midnight.
On rare occasions, I have witnessed storms lasting all night, and only faded
due to early morning twilight. Visibility of the Aurora may wax and wane
throughout the night. Patience is key….
Predictions and general information:
Solar Terrestrial Activity Report
Find your geomagnetic latitude
Current Space Weather
Real-time information and alerts:
My favorite site for receiving alerts and real-time updates is: www.spacew.com
The text messaging service is outstanding. It allows you to set parameters on when you want to be notified via a cell
phone or pager. It’s the ultimate “Heads-up! Aurora might be coming your way” service, in my opinion.
There have been numerous times when I’ve been 3, 4, 5 hours from home deciding whether a storm might begin or has
ended. My decision was easily made by a real-time alert.
Putting it all together:
If you monitor the above sites, you should always have a 1 to 4 day lead
time to prepare for the possibility of Aurora. I say possibility because
even the most violent solar events can sometimes be “duds” when they hit
Earth. The reason for this is that we need one more element to produce Aurora:
a southward tilt in the Interplanetary Magnetic Field (IMF). The IMF is a
part of the Sun's magnetic field that is carried outward into interplanetary
space by the solar wind. Bz measures the extent we are above or below the
thin boundary separating the IMF’s fields. This thin boundary between the
opposite magnetic fields is known as the heliospheric current sheet. The
current sheet is tilted due to the difference between the Sun's rotational
and magnetic axes, which is similar to the difference between Earth’s rotational
axis and magnetic poles. In addition to being tilted, the current sheet is
also warped. The result is that Earth’s magnetosphere is regularly, periodically
being influenced by either one of the opposite magnetic fields of the IMF.
To what degree we are entrenched in a specific polarity by moving further
above or below the current sheet is measured by Bz. The range of values for
Bz is + 50 to –50, with negative numbers indicating a southward tilt to the
IMF. In my experience, If the Bz is between –20 and –50 nT, then there is
a good shot the southward tilting IMF will partially cancel Earth’s magnetic
field at the point of contact. The door has been opened, and Elvis has entered
the building! If there is sufficient energy in the solar wind, then those
oxygen and nitrogen atoms will start doing their dance, and you’ll get a
nice show.
Determining the time of a shockwave arrival, and whether the IMF will
be in a favorable position to allow Aurora is as much an art as it is science.
These predictions are usually made with a 12 to 24 hour margin of error and
are becoming increasingly more accurate, but there is still room for improvement.
It is a good bet that if we are hit with a significant shock wave, and the
Bz is substantially southward, visible Aurora will be produced in middle
and possibly lower latitudes.
Locating the best places to view/photograph the Aurora: You’ll need a very
detailed map that includes areas within comfortable driving distance from
your home. I use an Atlas/Gazetteer. Most Aurora displays will not be visible
within urban areas due to light pollution. I try to find an area on the map
that doesn’t have medium or large towns/cities any nearer than 60 to 90 miles
in a 90-degree northward view from my desired location. This is a lot tougher
than it may appear. Strong displays might be seen in spite of all the light
pollution in cities, but such displays are rare. During major storms, if
you are far enough north (for people living in the Northern Hemisphere),
the display may actually happen right over your head, or even to the South
of you, so have a back-up spot available.
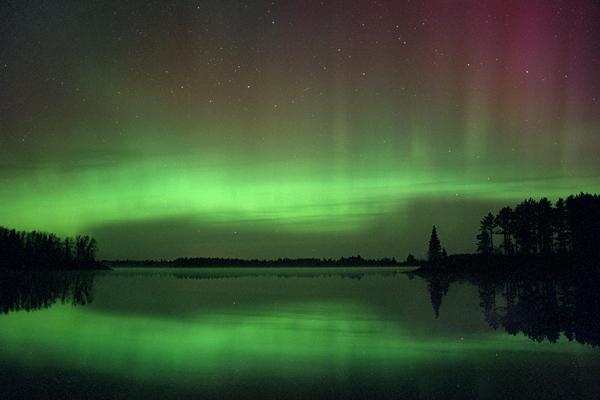
"Aurora Fish"
Technique and exposure:
Focussing: Set your camera to
manual focus. Rotate your focussing ring on the lens to “infinity”. The infinity
mark on some lenses is not accurate- so make sure you check your true infinity
focus point before actually going out on a hunt. It is also a good idea to
verify the focussing ring is in proper position after every roll you shoot,
and after every lens change. Some have suggested using rubber bands to lock
the focussing ring, but this is not foolproof either. Disastrous results
may occur if you are wooed into a sense of false security, only to find that
the 13 rolls of film you shot were all out of focus. Don’t ask me how I know
this… :-)
Exposure Settings:
Method 1: (When using 800 ISO film)
f1.4= 8 seconds
f2.0= 15 seconds
f2.8= 30 seconds
* These are baseline exposure times that should be the center point
for bracketing your exposures in ½ stop increments, plus/minus one stop. A
“stop” means doubling and halving the exposure time. Very bright, or high-latitude Aurora would need slightly faster exposures than these times.
Dim shows or lower latitudes would need slightly longer exposures.
Method 2:
Use your camera’s spot meter for bright Aurora by metering on the brightest
part it and double the indicated “proper” exposure time. Use that for a baseline, and then bracket plus/minus
one stop in ½ stop increments.
Firing the shutter: It is best
to use a cable release or automatic timer on your camera when firing the
shutter. This keeps movement of the camera to a minimum. It is also advisable
to use the mirror lock-up function on your camera to avoid movement from
the motion of the camera’s mirror “slapping” against the body.
Avoiding star trails: Some of
the best Aurora images I’ve seen include bright, crisp stars in them. To
avoid star trails (caused by the Earth’s rotation), I use the following formula:
Take 600 and divide it by the focal length of your lens. The result is the
maximum exposure time (in seconds) before star trails will start to appear.
Example: A maximum exposure for a 24mm lens would be 600/24 or 25 seconds.
Slightly longer times (+50%) may be used for less critical work.
Fast Aurora vs. slow aurora:
Slow-moving Aurora is more photogenic and easier to expose for than fast
moving or pulsating Aurora. Wider apertures (f2.0 or wider) or fatsre film
(800 ISO +) will be needed to record fast Aurora on film.
Aurora during moonlit nights:
Although it is more difficult to see Aurora during heavily moonlit nights,
it can make for an interesting effect since you will be able to get more
detail in the foreground elements.
Avoiding Bears and other critters:
Keep any food you bring in sealable plastic baggies. The last thing you
need is to have a hungry bear smell your goodies and “mess with your head”
while you are waiting for Aurora’s to appear.
Aurora myths:
Myth #1: Auroras make sounds- There is no scientific evidence to indicate Auroras make audible sounds.
Myth #2: You have to live far North to see Auroras- Auroras have been seen
as far south as California and Mexico in North America. This occurs during
major storms. There is also “Aurora Australis” which occurs in Earth’s Southern
Hemisphere as an almost mirror image of what happens in the Northern Hemisphere.
Myth #3: Auroras only occur during Winter- Auroras may occur during any time of the year.
Myth #4: Major Storms only occur during Solar Maximum- Solar maximum is the
peak within the 11-year solar cycle when sunspot activity is at its highest-
a result of the Sun’s magnetic field reversing polarities. There is
strong evidence to support major geomagnetic storms occurring any time during
the solar cycle, with frequent activity when the peak of the cycle is actually
abating.
For more information on Auroras: CLICK HERE
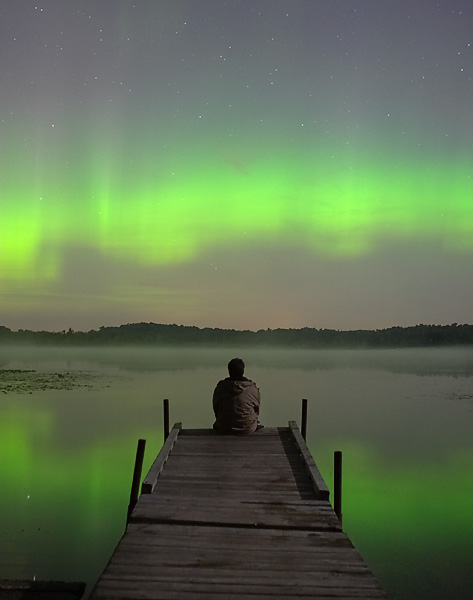
"Aurora and Me"
About the Author:
Chris VenHaus is the owner of VH Audio in North Prairie WI. He is also a photographer who specializes in Landscape, Aurora,
and Weather Photography. To see his photography click here
All content on this website copyright: Chris VenHaus 1997-2003