
| * VH Audio * | DIY AC Power Cables by Chris VenHaus |
|
Photography Pages My Landscape Photo
Gallery
Audiophile Pages My Stereo System
Photography Pages My Landscape Photo
Gallery
Audiophile Pages My Stereo System
Reviews of My DIY Cables DIY AC Mains Power Cables DIY Cat5 Speaker Cable DIY Fine Silver Interconnects DIY AES/EBU Digital Cable VH Audio (Cables & Parts) V-Cap Audio Capacitors Audio Related Books VH Audio product summary
|
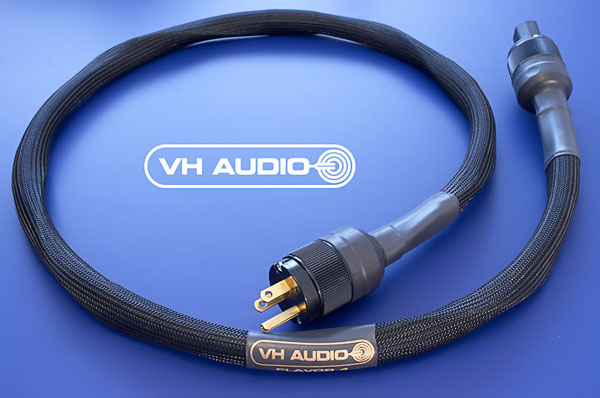 VH Audio Flavor 4 Power Cord The Objective: To construct top-notch, Audiophile-quality power cord without breaking the bank. Why use the new VH Audio Wire
vs. my original recommedation of Belden 83802?
My prior design based on the Belden 83802 wire sounded very, very good. However, there were certain parameters could be tweaked even more, producing an even better sounding power cord. The only problem is that I couldn't find anybody that sold the type of cable I had envisioned.
So I manufactured my own cable...
Here are the details:
* Two 12 AWG stranded conductors for low resistance. The rated maximum continuous current capacity for 12 AWG copper wire is in excess of 20 amps, which is more than enough capability for our application. * Each conductor contains 19 strands of .0188" bare copper wires (about 25 AWG) for a total AWG of 12 for each conductor. The higher strand count than the 83802 increases the surface area for better contact when the connectors are screwed to the wire. * Fluoropolymer insulation of the individual conductors AND outer jacket. Fluoropolymers (commonly known as Teflon, Teflon is about as close to the "Holy Grail" of dielectrics as it gets. * 100% shield coverage. This cable has both a foil AND braided shield, which effectively reduces RFI/EMI. This is important for keeping grunge out of the cable, but even more importantly to keep it localized within the cable and harmlessly drained to ground. * The entire braided shield is about 12 AWG, providing a low impedance path to ground. * The lay length (twists) of this new cable's twisted pair is 1" (12 twists per foot) vs. the Belden that has 4 twists per foot. This provides excellent RFI/EMI rejection, and also reduces the inductance (raises capacitance) vs. the 83802. * I have also tweaked a few other specs of my new wire for further improvement in sound quality. All parts to make my designs may be found at VH Audio If you aren't into the "DIY thing", I also offer all my power cable designs fully assembled. Design
In this design, it is very important to place a separate safety ground
outside
the twisted pair conductors to decrease the capacitive coupling
between the hot lead and the safety ground (vs. a safety ground within
the hot/neutral conductor bundle).
By spiralling the safety ground in the opposite direction of the twisted conductor pair, we further mitigate the effects between the hot and safety ground. Something I found to be very interesting was that no ONE type of construction method sounded best on all components. The components I used seemed to prefer one method or another. Please be sure to follow the right recipe for your component, in order to get full performance from these power cords. Lastly, after extensive listening tests, it seems these cables need to "cook" for about 100-200 hours to reach optimum performance. Parts Required:
VH Audio 12 AWG shielded twisted pair cable
WattGate, Furutech or Oyaide IEC connectors * Expandable Nylon Sleeving * You need about 20% more than the length of your cable to account for linear shrinkage, as the techflex expands. * Fluoropolymer Insulated 12 AWG Stranded Copper Wire (order 15% more than the length of your cable, to account for the shrinkage when spiraling around the cable). Construction:
This cord is relatively easy to make- especially when compared to the sheer torment of making the DIY Cat5 Cables :-P Flavor #1 (best with grounded digital components)
Step 1: Cut the shielded
cable to desired finished length.
Flavor #2 (this version sounds best with amplifiers and most other grounded analog components)
* Use the unshielded version of the VH Audio Wire. This lowers the capacitive coupling even further between hot and safety ground * there is > 1/8" spacing between the safety ground and inner conductors by using the heavy walled high-pressure air hose as a spacer. Combined with the shield removal and the counter-spiralled ground, I believe this design may achieve the absolute lowest capacitive coupling between the inner conductors and safety ground. * The "end product" has a diameter of about 5/8" and looks REALLY, REALLY, SERIOUS- especially with the nylon sleeving over it. Your friends will ask: "Why do you have garden hoses attached to your stereo components?"
Additional parts:
** Order about 20% more ground wire than the length of your cable, to account for the length shrinkage that occurs when spiraling around the rubber hose. Also get about 30% more techflex than the length you intend to make... Step 1:
Cut the cable to desired finished length.
Flavor #3 for use with all components that don't require a safety ground. This was best for my non-grounded digital components
Same as "Flavor 1" except we don't use a safety ground. Just use the raw VH Audio Shielded cable (no need to use or wind a 12 AWG safety ground). You still must "comb" and then twist the braiding at the source end (male plug) and connect it to ground. The Sound
So what do they sound like? Does my stereo now go to "11"?
(for
"Spinal Tap" fans out there)
I never thought power cables could make a significant difference in my system. I was wrong............. Good luck, and enjoy! Notes: * Try experimenting by using a ferrite clamp on the safety ground only at the load end (the end with the IEC). Many people have suggested that use of Ferrites help filter out garbage in power cords, but I have found that Ferrites constrict the dynamics of the system and they ADD inductance to the hot/neutral (rather than lower it- which is our objective). By putting the ferrite on the safety ground only, we are able to attenuate any unwanted nasties that try to make it into the component via the ground. (you don't need to do this tweak with "Flavor #3", because the ground is not coupled to the component) * It would also be a good idea to upgrade your AC receptacles
at this time, since they are relatively inexpensive and easy to install. VH Audio stocks Oyaide, and Furutech receptacles at good prices...
Would you like to write a review of these power cables? Legal Stuff: All content on this site is property of Christopher J. VenHaus copyright 1999-2013, all rights reserved. All images are copyright protected and may not be distributed in any manner without written permission. I do not endorse, and expressly forbid attempts to "commercialize" any of my cable designs for profit, without permission. Flavor 1, Flavor 2, and Flavor 3, Flavor 4, and The Hot Box are trademarks of VH Audio, Inc. |


