| * VH Audio * |
|
|
Aurora Photo Gallery Ordering Prints Photography Tips Recommended Books Low-cost Film & New Equipment Where to Buy Used Equipment My Equipment & Film Choices Audiophile Pages Reviews of My DIY Cables DIY AC Mains Power Cables DIY Cat5 Speaker Cable DIY Fine Silver Interconnects DIY AES/EBU Digital Cable VH Audio (Cables & Parts) V-Cap Teflon® Audio Capacitors Tube amp and preamp mod services H/T Subwoofer Kit Car Audio Parts Audio Related Books
Aurora Photo Gallery Ordering Prints Photography Tips Recommended Books Low-cost Film & New Equipment Where to Buy Used Equipment My Equipment & Film Choices Audiophile Pages Reviews of My DIY Cables DIY AC Mains Power Cables DIY Cat5 Speaker Cable DIY Fine Silver Interconnects DIY AES/EBU Digital Cable VH Audio (Cables & Parts) V-Cap Teflon® Audio Capacitors Tube amp and preamp mod services H/T Subwoofer Kit Car Audio Parts Audio Related Books
Aurora Photo Gallery Ordering Prints Photography Tips Recommended Books Low-cost Film & New Equipment Where to Buy Used Equipment My Equipment & Film Choices Audiophile Pages Reviews of My DIY Cables DIY AC Mains Power Cables DIY Cat5 Speaker Cable DIY Fine Silver Interconnects DIY AES/EBU Digital Cable VH Audio (Cables & Parts) V-Cap Teflon® Audio Capacitors Tube amp and preamp mod services H/T Subwoofer Kit Car Audio Parts Audio Related Books
Aurora Photo Gallery Ordering Prints Photography Tips Recommended Books Low-cost Film & New Equipment Where to Buy Used Equipment My Equipment & Film Choices Audiophile Pages Reviews of My DIY Cables DIY AC Mains Power Cables DIY Cat5 Speaker Cable DIY Fine Silver Interconnects DIY AES/EBU Digital Cable VH Audio (Cables & Parts) V-Cap Teflon® Audio Capacitors Tube amp and preamp mod services H/T Subwoofer Kit Car Audio Parts Audio Related Books
Aurora Photo Gallery Ordering Prints Photography Tips Recommended Books Low-cost Film & New Equipment Where to Buy Used Equipment My Equipment & Film Choices Audiophile Pages Reviews of My DIY Cables DIY AC Mains Power Cables DIY Cat5 Speaker Cable DIY Fine Silver Interconnects DIY AES/EBU Digital Cable VH Audio (Cables & Parts) V-Cap Teflon® Audio Capacitors Tube amp and preamp mod services H/T Subwoofer Kit Car Audio Parts Audio Related Books
Aurora Photo Gallery Ordering Prints Photography Tips Recommended Books Low-cost Film & New Equipment Where to Buy Used Equipment My Equipment & Film Choices Audiophile Pages Reviews of My DIY Cables DIY AC Mains Power Cables DIY Cat5 Speaker Cable DIY Fine Silver Interconnects DIY AES/EBU Digital Cable VH Audio (Cables & Parts) V-Cap Teflon® Audio Capacitors Tube amp and preamp mod services H/T Subwoofer Kit Car Audio Parts Audio Related Books
Aurora Photo Gallery Ordering Prints Photography Tips Recommended Books Low-cost Film & New Equipment Where to Buy Used Equipment My Equipment & Film Choices Audiophile Pages Reviews of My DIY Cables DIY AC Mains Power Cables DIY Cat5 Speaker Cable DIY Fine Silver Interconnects DIY AES/EBU Digital Cable VH Audio (Cables & Parts) V-Cap Teflon® Audio Capacitors Tube amp and preamp mod services H/T Subwoofer Kit Car Audio Parts Audio Related Books
|
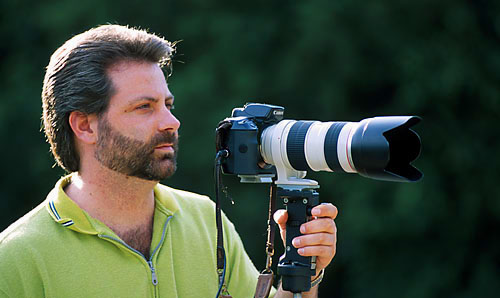
Buy the best lenses you can afford- a new
camera body with "consumer" grade zoom lenses (especially the long zooms
out to 200-300mm) will usually produce inferior images to a modest camera
body with "prime lenses" (fixed focal length) and/or high quality (expensive)
zooms. Prioritize your budget into the lenses first, then the camera body.
Nikon or Canon bodies for 35mm are the best choices due to the availability
and variety of lenses. I VERY rarely use the autofocus feature on my camera.
If I had to do it all over again (and was on a limited budget), I would
probably buy an older manual focus Canon or Nikon with used prime and high
quality zoom lenses. This won't cost you much more than buying a new camera
body with crappy zooms. Make sure your camera has manual controls for setting
aperture and shutter speed, along with a "bulb" setting. Mirror lock-up
is also a plus. These recommendations are for Landscape Photography. Wildlife
and portrait photography have different requirements.
A decent landscape photo equipment setup would
be:
* A small fanny pack with water bottle * A good flashlight (the small mag-lights work well) * A small can of compressed air * A good bulb brush * Cable release * Umbrella * Circular Polarizer * MicroFiber Lens Cloth- DON'T use lens tissue. It's junk. * Lens Cleaning Fluid Optional:
Most of these items may be found at Adorama. Shoot alot! This is the only way to learn and get better. The human eye "sees" differently than film. You need to learn how to "see" what the film will see. Don't have your family/friends critique your images. If you want honesty, post them on an online photo forum. Don't take the critiques personally, and don't make excuses for poor composition- even if there are elements which were OUT OF YOUR CONTROL- it might make an interesting story, but in the end the viewer of the image doesn't care about the limitations you had at the time.... Don't be too defensive about your shots- even the most brutal critique usually has some legitimate substance to it. This is about making your images BETTER, not getting your ego stroked. That will come later, when you are producing outstanding images. Keep your landscape horizon level. There is nothing more irritating than seeing a landscape with a tilted horizon. If you make images with tilted horizons, you aren't paying attention to the detail of your composition. Slow down. Don't be afraid to buy used lenses- you'll get more "bang for your buck", and most photographers who use primes or expensive zooms ("L" or flourite lenses for Canon or "D" lenses for Nikon) usually take pretty good care of their stuff. Try e-Bay and be cognizant of the user ratings and feedback. Also, don't overpay for lenses at online auctions. Some of the best deals on new lenses may be found HERE Slide film will usually produce better overall images than print film, but it must be exposed properly since it has less latitude than print film. I usually use Fuji Provia 100F, Fuji Velvia, and Kodak E100SW. Use the Hyperfocal Distance to obtain the fastest
shutter speed with greatest depth of field. I will usually calculate
the necessary depth of field for a particular composition, while trying
to stay around f8 to f11- which is where most lenses operate at optimum
sharpness. If I am presented with fast moving clouds and low light conditions,
I may have to sacrifice depth of field for shutter speed. It is important
for you to determine what is most important in your composition.
The depth of field scales you find on most prime lenses use a Circle of confusion of .030 mm, but I usually use a C.O.C. of less than .020 mm Here is a printable Hyperfocal Chart I made on an Excel spreadsheet. Also, there's a little bonus for you on proper settings for lightning and aurora photography. Bracket your exposures!!! Film is cheap, when compared to a lost shot. I usually bracket my exposures by 1/2 stop increments +/- 1 stop from TTL (through the lens) camera meter recommendation. I can't remember ever having missed a shot because of a bad exposure using this method. It also allows you to shoot a greater variety of compositions in quickly changing light conditions, without alot of time-consuming fiddling around. When shooting snow or foggy scenes- overexpose by 1- 2 stops from your camera's meter reading. Then bracket from there. ALWAYS use a tripod before clicking the shutter. Also, use a cable release. You'd be amazed at how much sharper your pictures will be. Some people make the mistake of assuming the camera should be on the tripod at all times. Not true, in my experience. When composing a shot, you should have the camera off the tripod to determine the best camera orientation. It may be necessary for you to move towards, away, up, down, or laterally relative to your subject in order to gain the biggest impact from your image. You have significantly more freedom to do this when the camera is off the tripod. Also, experiment with horizontal AND vertical compositions. When you have a good composition, then set-up on the tripod and shoot away. Carry a good compass. Not only is this a good idea if and when you get lost, but it will also help when scouting an area. You may use the compass in conjunction with sun position tables to determine where the sun or moon will be at sunrise or sunset. This technique has helped me get alot of shots I may have otherwise missed. Don't rely on compass readings while you're in your car, as the electronics in your car may give a false reading. Know when when the sun and/or moon rises or sets, and be at your location no later than civil twilight for sunrise, or 1 hour before sunset. The hour before and after sunrise and sunset usually produce some of the better landscape images, as the light has a special warm quality, and often the clouds have extraordinary colors and lighting. Be original! Develop your own style and unique vision. Any competent photographer can duplicate others' work, truly great photographers produce unique images. Avoid cliche' photography. Know your weather. Most really good landscape shots have some type of unusual weather or unique cloud formations. Go to accuweather.com for satellite images, and the National Weather Service for weather predictions. Even the most boring landscape shot may become outstanding with unusual or extreme weather conditions. Study your subject. Before you look into the viewfinder of your camera, ask yourself "what is my subject", and then simplify. Most outstanding images don't have a lot of clutter or many different points of interest. Usually, there is one main focal point and a secondary point of interest to "lead the eye" through the image. Having a point of interest in the foreground will help add a pleasing 3-dimensionality to the image, and will usually provide more impact. "Abstract" landscapes are less likely to need a foreground interest point. Easy with the circular polarizer. Be careful using polarizers with wide angle lenses, the effects are usually undesirable when alot of sky is included, and you are at a right angle to the sun. Polarizers may be very useful in certain situations- especially when removing reflections from water, increasing color saturation, or cutting through haze. Keep an extra (fresh) battery in your bag. Murphy's Law applies here. If you don't keep an extra battery in your bag, your camera will die, just when that "shot of a lifetime" presents itself. I now carry TWO extra batteries, after discovering a new backup battery was completely dead right in the middle of a spectacular lightning storm. By the time I ran to a store that carried the right battery- the storm was over.... Always close your bag. When light conditions are changing, you may get excited about moving to another spot to capture a great shot. It can be a significant bummer when you rush to gather your equipment, pick up your bag, and lenses/film fall out. Buy and read Photography Books from masters. Unless you have a mentor that is an exceptional photographer, you'll have to teach yourself. The best way to do this is to absorb everything you can from your experiences AND absorb the knowledge and experiences of professionals. Click here for great books that will help improve your skills. I have also found a GREAT place to renew/subscribe to some of the top photography magazines (or any other maagazine for that matter). Click on the Outdoor Photographer link at the top of this page for more info.... Keep an umbrella handy. Even cameras mounted on a sturdy tripod are susceptible to vibration when there is a stiff wind. An umbrella may be used to shield your camera on such occasions.
Legal Stuff:
|